Crochet ideas
Crochet Oval Doily Table Runner (Free Pattern, 2 Sizes)
September 30, 2026
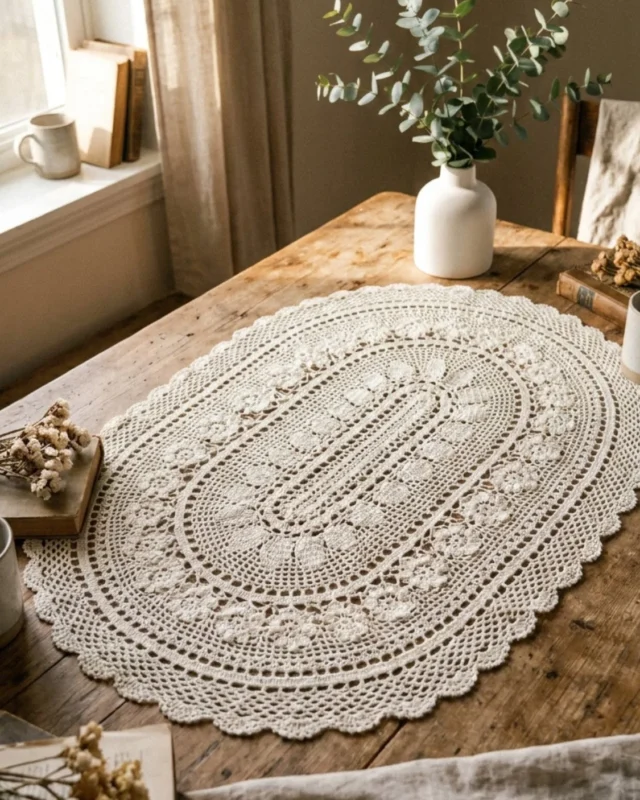
A crochet oval doily is one of the easiest ways to make a table feel finished. Put it under a vase of greenery, a candle, or a bowl of fruit, and it instantly looks warm and handmade. This free pattern is worked in rounds around a foundation chain, which is what makes the oval shape. Solid rounds alternate with open mesh rounds for a light, lacy look, and a shell and picot border finishes the edge. It only uses chains, single crochet and double crochet, and every round has a stitch count so you always know you’re on track.
Before You Start
Sizes
Standard: About 12 x 20 inches after blocking. For a coffee table, side table or small dining table.
Large: About 16 x 24 inches after blocking. For a dining table centerpiece.
Materials
Yarn: DK weight (#3) cotton or cotton blend.
- Standard: about 175 yards.
- Large: about 250 yards.
Cotton is best for table linens. It washes well, holds its shape, and doesn’t get fuzzy. Cream, white and natural are the classic choices.
Hook: 4mm (G/6)
4 stitch markers
Yarn needle and scissors.
For blocking: Foam mats or a folded towel, rust-proof pins, and spray starch (optional).
Gauge
18 dc and 9 rounds = 4 inches (10 cm).
Abbreviations (US Terms)
ch: Chain
sl st: Slip stitch
sc: Single crochet
dc: Double crochet
sp: Space
st(s): Stitch(es)
How the Oval Works
An oval is made of two straight sides and two curved ends. You work the first round down one side of a foundation chain, around the end, and back along the other side. After that, the straight sides always stay 36 stitches, and all the increases go into the curved ends. That’s what keeps the doily flat and oval instead of round.
Every round in this pattern is written in four sections: Side, End, Side, End. Place a marker in the first stitch of each section on Round 1 and move the markers up as you go. It makes the whole pattern easy to follow.
How to Crochet the Oval Doily
Foundation Chain
Ch 40.
Round 1
Dc in the 4th ch from the hook and in the next 35 ch (36 dc). 6 dc in the last ch. Working along the other side of the chain, dc in the next 36 ch. 6 dc in the next ch. This is the ch at the start, where the first 3 chains were skipped. Join with a sl st to the first dc.
84 sts: 36 on each side, 6 on each end.
Round 2
Ch 2 (does not count as a stitch). Dc in the same st as the join and in the next 35 sts. 2 dc in each of the next 6 sts. Dc in the next 36 sts. 2 dc in each of the next 6 sts. Join with a sl st to the first dc.
96 sts: 36 on each side, 12 on each end.
Round 3 (Mesh)
Ch 4 (counts as a dc and ch 1). Skip the next st. *Dc in the next st, ch 1, skip the next st. Repeat from * around. Join with a sl st to the 3rd ch of the ch-4.
48 dc and 48 ch-1 spaces. In the next round, count each ch-1 space as 1 stitch. That gives you 96 stitches: 36 on each side and 12 on each end.
Round 4
Ch 2. Dc in the same st as the join and in the next 35 sts, counting each ch-1 space as a stitch. 2 dc in each of the next 12 sts. Dc in the next 36 sts. 2 dc in each of the next 12 sts. Join.
120 sts: 36 on each side, 24 on each end.
Round 5 (Mesh)
Repeat Round 3.
120 sts, counting ch-1 spaces.
Round 6
Ch 2. Dc in the same st as the join and in the next 35 sts. *Dc in the next st, 2 dc in the next st. Repeat from * 12 times across the end. Dc in the next 36 sts. Repeat the same increases across the second end. Join.
144 sts: 36 on each side, 36 on each end.
Round 7 (Mesh)
Repeat Round 3.
144 sts.
Round 8
Ch 2. Dc in the same st as the join and in the next 35 sts. *Dc in the next 2 sts, 2 dc in the next st. Repeat from * 12 times across the end. Dc in the next 36 sts. Repeat the same increases across the second end. Join.
168 sts: 36 on each side, 48 on each end.
Round 9 (Mesh)
Repeat Round 3.
168 sts.
Round 10
Ch 2. Dc in the same st as the join and in the next 35 sts. *Dc in the next 3 sts, 2 dc in the next st. Repeat from * 12 times across the end. Dc in the next 36 sts. Repeat the same increases across the second end. Join.
192 sts: 36 on each side, 60 on each end.
Round 11 (Mesh)
Repeat Round 3.
192 sts.
Round 12
Ch 2. Dc in the same st as the join and in the next 35 sts. *Dc in the next 4 sts, 2 dc in the next st. Repeat from * 12 times across the end. Dc in the next 36 sts. Repeat the same increases across the second end. Join.
216 sts: 36 on each side, 72 on each end.
Standard size: Go to the border.
Rounds 13 to 16 (Large Size Only)
Round 13 (mesh): Repeat Round 3. 216 sts.
Round 14: Work the sides as before. On each end: *dc in the next 5 sts, 2 dc in the next st. Repeat from * 12 times. 240 sts: 36 on each side, 84 on each end.
Round 15 (mesh): Repeat Round 3. 240 sts.
Round 16: Work the sides as before. On each end: *dc in the next 6 sts, 2 dc in the next st. Repeat from * 12 times. 264 sts: 36 on each side, 96 on each end.
How to Add the Shell and Picot Border
Shell Round
Ch 1. Sc in the same st as the join. *Skip 2 sts, 5 dc in the next st, skip 2 sts, sc in the next st. Repeat from * around. On the last repeat, skip the last 2 sts and join with a sl st to the first sc instead of working another sc.
Standard: 36 shells. 6 on each side and 12 on each end.
Large: 44 shells. 6 on each side and 16 on each end.
Picot Round
*Sc in the next 2 dc. In the center dc of the shell, work (sc, ch 3, sc). Sc in the next 2 dc, sl st in the next sc. Repeat from * around.
Fasten off and weave in all the ends.
How to Block Your Doily
Blocking is what makes a doily lie flat and look finished. Cotton needs it more than any other fiber.
- Soak the doily in cool water for 15 minutes. Squeeze out the water gently, and roll it in a towel to remove more.
- Lay it on foam mats or a folded towel. Shape it into an even oval with straight sides.
- Pin the outer edge, putting one pin in each picot. Gently open up the mesh rounds as you go.
- For a crisp finish, spray lightly with starch.
- Let it dry completely before unpinning.
Tips for a Flat Oval
Count every round. Your sides must always have 36 stitches. If a side has more or fewer, the oval will twist.
Count ch-1 spaces as stitches. After a mesh round, each ch-1 space counts as 1 stitch in the next round. This is the most common place to lose count.
A little wave is normal after mesh rounds. The mesh rounds don’t add stitches, so the edge may ruffle slightly. The next solid round fixes it, and blocking flattens the rest.
If it cups into a bowl, your tension is tight. Go up half a hook size.
If it ruffles after a solid round, your tension is loose. Go down half a hook size.
How to Style Your Oval Doily
Dining table: Center it with a vase of eucalyptus, a candle, or a wood bowl.
Coffee table: Layer it under a stack of books or a small plant.
Farmhouse: Pair it with a wood tray and mason jars.
Holidays: Swap in pine cones and candles for winter, or pumpkins for fall.
Care
Machine wash cotton on a gentle cycle in a mesh laundry bag, or hand wash in cool water. Lay flat to dry and pin it back into shape if it needs it. Starch again after washing for a crisp look.
FAQ
Is this oval doily good for beginners?
Yes. It only uses chains, single crochet and double crochet. The only tricky part is keeping track of the sides and ends, and the markers make that easy.
Can I make it bigger?
Yes. Keep alternating mesh rounds with solid rounds. On each new solid round, add 1 more dc before each increase on the ends: 7 dc and then an increase, then 8 dc and an increase, and so on. The sides always stay at 36 stitches. Finish with the border on any solid round.
Can I use crochet thread instead?
- Yes. With size 10 crochet thread and a 1.75mm hook, you’ll get a much smaller, more delicate doily. With the same number of rounds, it will be about half the size.
Palette from this room